



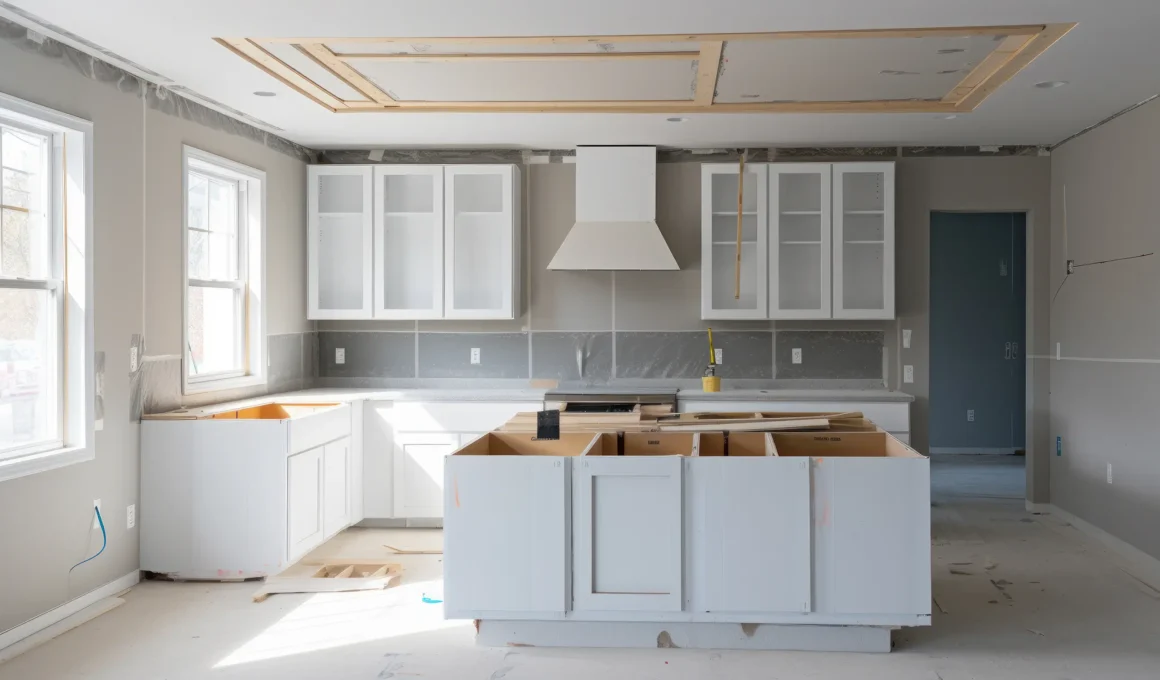
The most visible parts of a kitchen or bathroom renovation are usually selected first. Homeowners compare tile samples, faucets, worktops, sinks, lighting, and cabinetry while imagining how the finished room will look. Yet many of the decisions that determine whether those features work properly are made before any of them are installed.
Plumbing rough-in is the stage when the main supply, drainage, and venting components are positioned inside open floors, ceilings, and walls. Fixtures such as sinks, toilets, and faucets are generally installed later. In practical terms, rough-in creates the hidden framework that the finished room must follow.
For homeowners researching plumbing rough In before a renovation, the most important lesson is that it should not be treated as an isolated trade task. It is part of the design process because its position affects cabinetry, wall depth, circulation, appliance placement, and almost every water-using feature in the room.
What Is Included in Plumbing Rough-In?
Plumbing rough-in usually includes the pipes and connections that need to be installed before finished surfaces conceal them. The precise scope depends on the property, project, contract, and local requirements, but it commonly covers several connected systems.
The water supply lines bring hot and cold water toward sinks, showers, tubs, toilets, appliances, and other fixtures. The drain-waste-vent system carries used water away while helping fixtures drain correctly and protecting water seals within traps.
Connections may also be prepared for:
- Toilets, sinks, tubs, and showers
- Washing machines and dishwashers
- Refrigerators and filtered-water systems
- Water heaters
- Outdoor faucets
- Future bathrooms or utility spaces
The rough-in stage can also include fixture supports, pipe brackets, openings through framing, equipment connections, and provisions for future access. It does not normally mean that every faucet, toilet, sink, or decorative fitting has been installed. Those visible components are generally completed during finish plumbing.
Why Rough-In Belongs in the Design Conversation
Fixtures Are More Than Decorative Choices
A faucet may look like a simple finishing detail, but its installation requirements can affect the wall behind it. A shower valve has a specific installation depth. A freestanding tub requires a carefully positioned drain and filler. An island sink needs water, drainage, and venting to reach a location with no conventional plumbing wall.
This is particularly important with wall-mounted fixtures. Their internal components must be installed at the correct height and depth before tile, plaster, stone, or wall panels are added. A small positioning error can leave handles sitting too far from the wall, trim plates unable to fit, or a faucet poorly aligned with the basin.
Selecting the actual models early gives the design and construction teams access to manufacturer drawings, dimensions, clearances, and mounting instructions.
Hidden Pipes Establish Visible Geometry
Plumbing can influence how thick a wall must be, where a vanity can sit, and whether a drawer collides with a trap or valve. It can also affect the size of service cavities, the position of floor joists, and the available space beneath a sink.
In a kitchen renovation, the sink position may influence the dishwasher, waste system, filtration equipment, storage, work surface, and window or island composition. A successful sink zone is therefore a coordinated system rather than a collection of separate products.
The same principle applies to a bathroom layout. A floating vanity, recessed cabinet, concealed cistern, heated floor, large-format tile pattern, and frameless shower may all depend on plumbing being placed with the final design in mind.
Decisions to Make Before Rough-In Begins
The rough-in should be based on more than a general floor plan. Several details need to be confirmed while the framing remains visible and changes are still comparatively manageable.
Confirm the Exact Fixtures
Whenever possible, choose the actual sink, faucet, shower system, tub, toilet, appliances, and accessories before pipes are positioned.
The plumber may need product-specific information such as:
- Valve installation depth
- Faucet reach and height
- Drain position
- Water connection position
- Required supports
- Finished floor or wall reference
- Access requirements
A generic symbol on a drawing may not provide enough information for an unusual or highly integrated product.
Establish Finished Dimensions
Rough-in measurements must relate to the completed room, not only to exposed studs or subfloor.
The team should account for tile, backer board, plaster, wall panels, flooring, worktops, cabinet faces, and other material layers. Otherwise, a fitting that appears correctly positioned during construction may be too deep or too shallow once the finishes are installed.
Coordinate Cabinets and Appliances
Cabinet drawings should be reviewed alongside the plumbing plan. Deep sinks, internal drawers, waste containers, water filters, and appliance hoses all compete for space.
This coordination helps prevent common problems such as:
- A drain crossing through a drawer
- A valve hidden behind an appliance
- Insufficient room for a filtration unit
- A dishwasher hose stretched across the cabinet
- A sink that cannot be centred as intended
Plan for Maintenance
A minimal interior should not become impossible to service. Concealed components still require reasonable access.
Access panels can often be positioned inside closets, vanity cabinets, adjoining rooms, or discreet removable sections. Their locations should be considered before continuous tile, custom millwork, or decorative wall treatments are finalized.
Common Rough-In Planning Mistakes
Choosing Fixtures After the Pipes Are Installed
Late fixture selection is one of the most avoidable causes of rework. Two products that look similar may require different valve depths, drain positions, supports, or clearances.
This is why the phrase “standard size” should be treated cautiously. The project should follow the technical information for the actual selected product.
Moving Plumbing Without Studying the Full Route
Relocating a toilet or sink is not simply a matter of extending one pipe. The new position may affect framing, drainage distance, venting, ceiling space below, and access to the main stack.
Moving plumbing can be completely reasonable when it improves the room, but the decision should be based on the full route rather than the visible floor plan alone.
Treating Drainage and Venting as an Afterthought
Drainage needs an appropriate route, and the pipe slope cannot be considered separately from joists, beams, ceilings, and other services. Venting also needs to protect the drainage system while complying with the rules that apply to the project.
A vent stack is not a decorative constraint that can simply be moved out of sight. Its route should be incorporated into the architecture, much like a structural column, duct, or service riser.
Closing the Walls Too Soon
Rough plumbing is commonly inspected before it is covered. Municipal guidance often requires drainage, venting, and distribution systems to be examined and tested before walls, floors, or ceilings conceal the work.
Before finishes begin, the project may need a plumbing inspection, leak testing, or a pressure test, depending on the system and local process. Drywall, insulation, cabinetry, and tile should not be used to hide unfinished or unapproved work.
Poor Coordination Between Trades
Plumbing does not occupy an empty building. It shares walls, ceilings, and floors with electrical wiring, ventilation, structure, insulation, and millwork.
Coordination between trades becomes especially important around:
- Recessed medicine cabinets
- Wall niches
- Underfloor heating
- Ceiling-mounted rain showers
- Kitchen islands
- Structural beams
- Concealed lighting
- Custom vanities
Resolving these intersections on drawings or during an open-wall walkthrough is easier than correcting them after finishing materials arrive.
What Should Homeowners Check Before the Walls Close?
A pre-wall walkthrough is an opportunity to compare the installation with the intended design. Homeowners do not need to perform a technical inspection, but they should confirm that the visible arrangement matches the approved plans and selected products.
Useful checks include:
- Compare all fixture locations with the final floor plan.
- Confirm faucet, showerhead, valve, and outlet heights.
- Check that cabinet and appliance drawings match the pipe positions.
- Identify the main and local shutoff valves.
- Confirm that concealed equipment will remain accessible.
- Review any changes made after the original drawings.
- Make sure required testing and inspection have been completed.
- Photograph every open wall before it is covered.
Photographs can become a useful record for future repairs, renovations, drilling, or fixture replacement. Include a tape measure or fixed reference point in some images so pipe positions can be estimated later.
When Professional Coordination Makes Sense
Minor fixture replacement and visible maintenance are very different from designing pipes that will be hidden within the building. Rough-in work involves drainage, venting, water distribution, structural penetrations, permits, testing, and local inspection requirements.
A qualified plumber can review the proposed room design, product specifications, existing pipe routes, and construction sequence before the work is concealed. For example, local Canadian plumbers such as Cheap Plumber coordinates rough-in installations with renovation requirements, helping homeowners and contractors confirm practical pipe routes, fixture connections, testing, and access before finished surfaces are installed.
Professional involvement is especially important when:
- A kitchen or bathroom is moving to a new area
- A concrete floor must be opened
- Several fixtures share a compact plumbing wall
- A concealed shower system is planned
- Structural framing affects drainage routes
- Existing pipes are old, damaged, or poorly arranged
- Previous work was completed without clear documentation
Final Thoughts
Plumbing rough-in may disappear behind walls, but its influence remains visible throughout the finished room. It determines whether faucets align with sinks, cabinets function properly, showers feel comfortable, appliances connect neatly, and concealed components can be maintained.
The best time to solve these details is before the finishes begin. By selecting fixtures early, coordinating technical drawings, reviewing the open walls, and completing the necessary inspections, homeowners can protect both the function and the visual clarity of a renovation.
A well-designed room is not created only by what can be seen. It is also shaped by the systems carefully planned behind it.